Atelier
Yek
Design. Photography. Art. Fabrication.
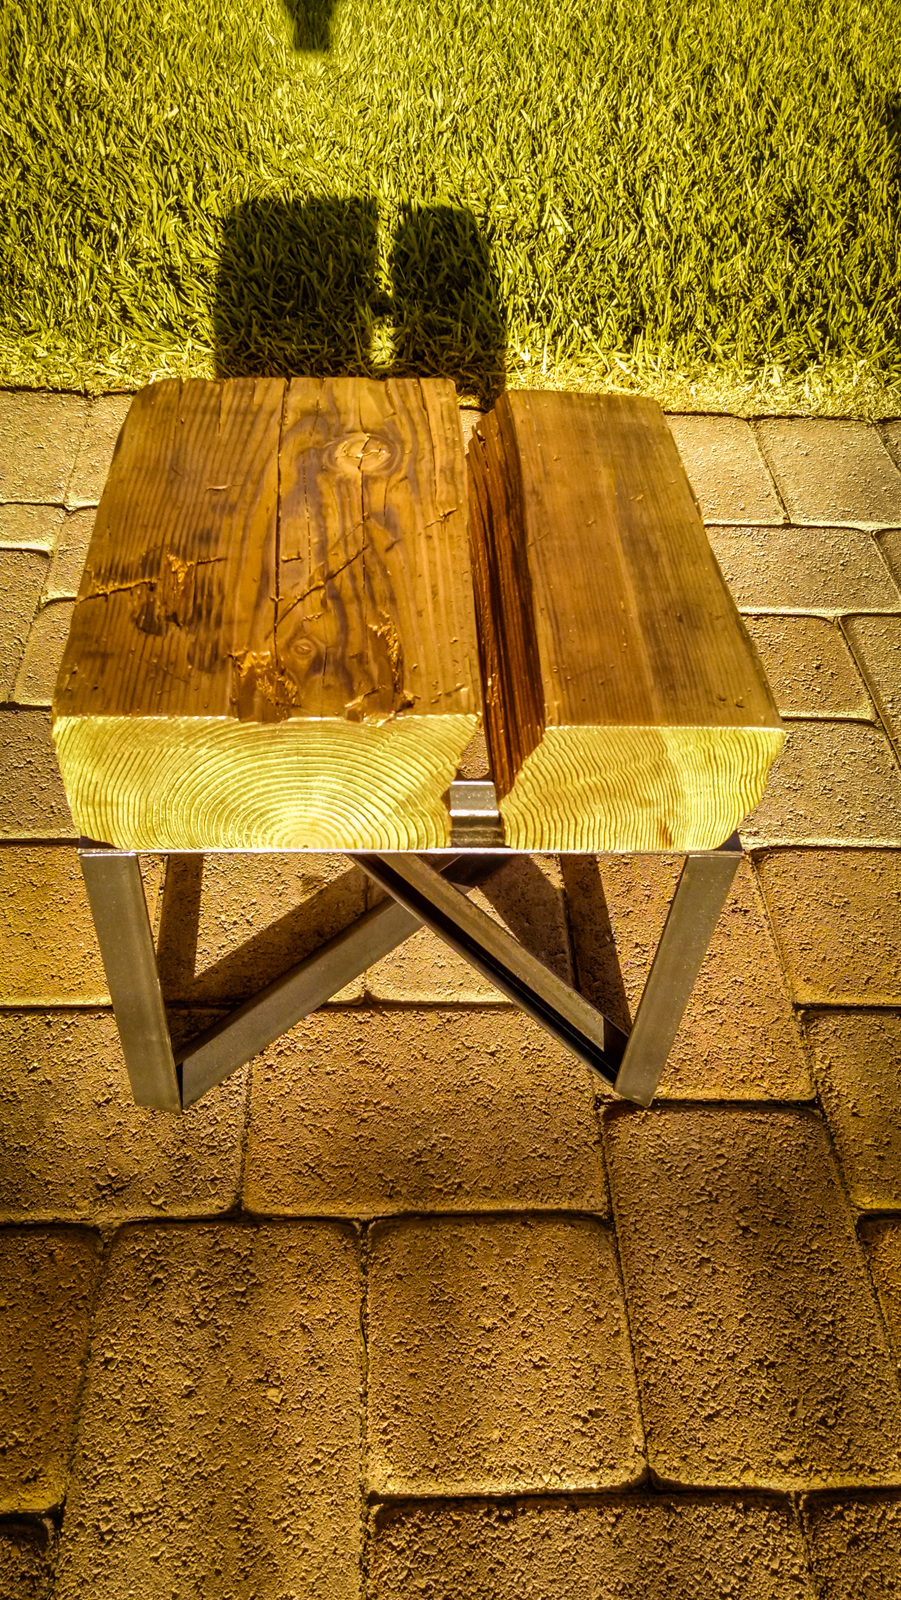
As the bench before this the wood was sourced from scrap I found in Studio over two Years ago. Over the course of two days I made a stool that I use for tying my shoes and holding my bag.
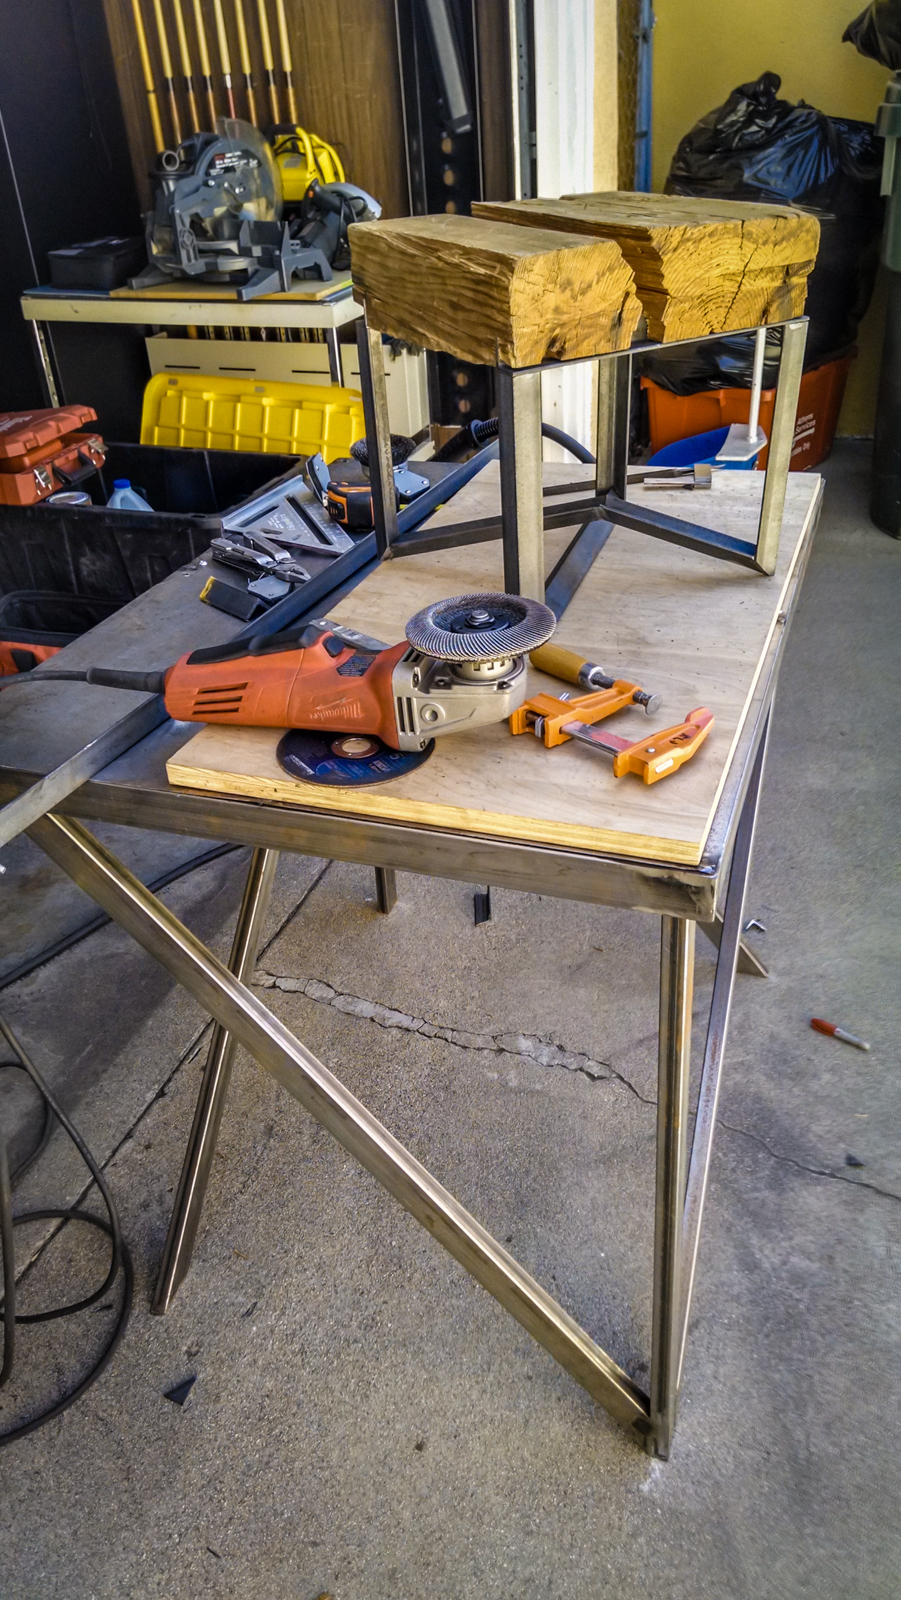
The Completed Stool


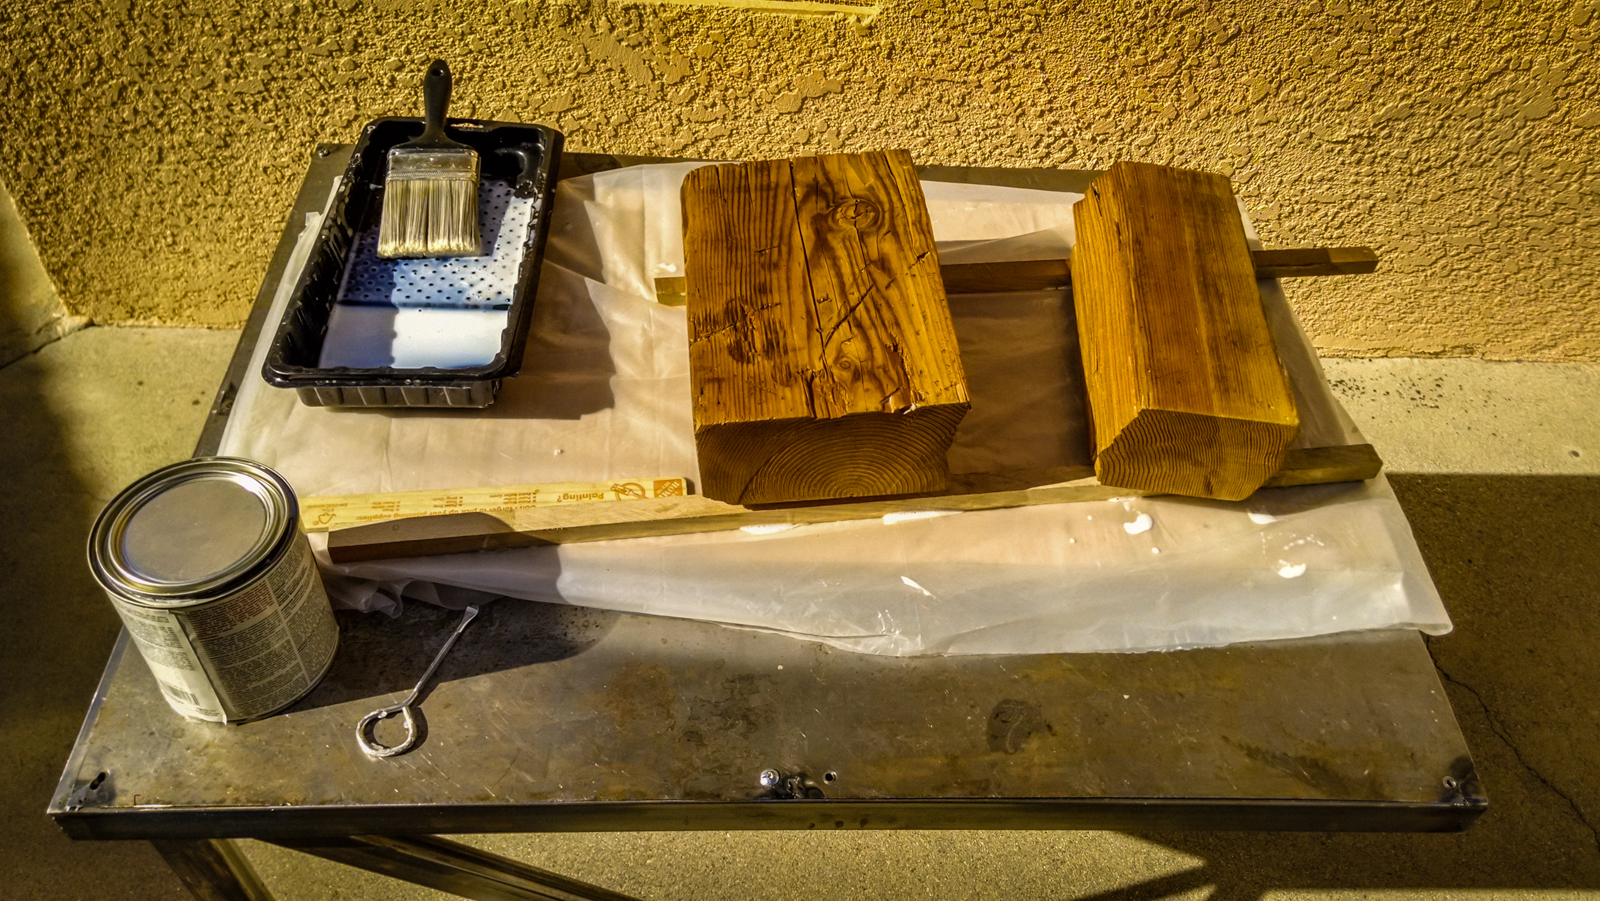
When I initially was cleaning out the soon to be Solar Decathlon Studio I found some used old lumber in a somewhat dire condition. The first was turned into a bench for friends and the second I used for a stool.
Since I first saw the piece I knew the "broken" bit of lumber could be a interesting little piece of something. It had wonderful grain on one of the ends and the split was pretty clean and interesting. I had a few initial ideas that involved rods and as linkages but decided to opt for something a bit more simple and cleaner.
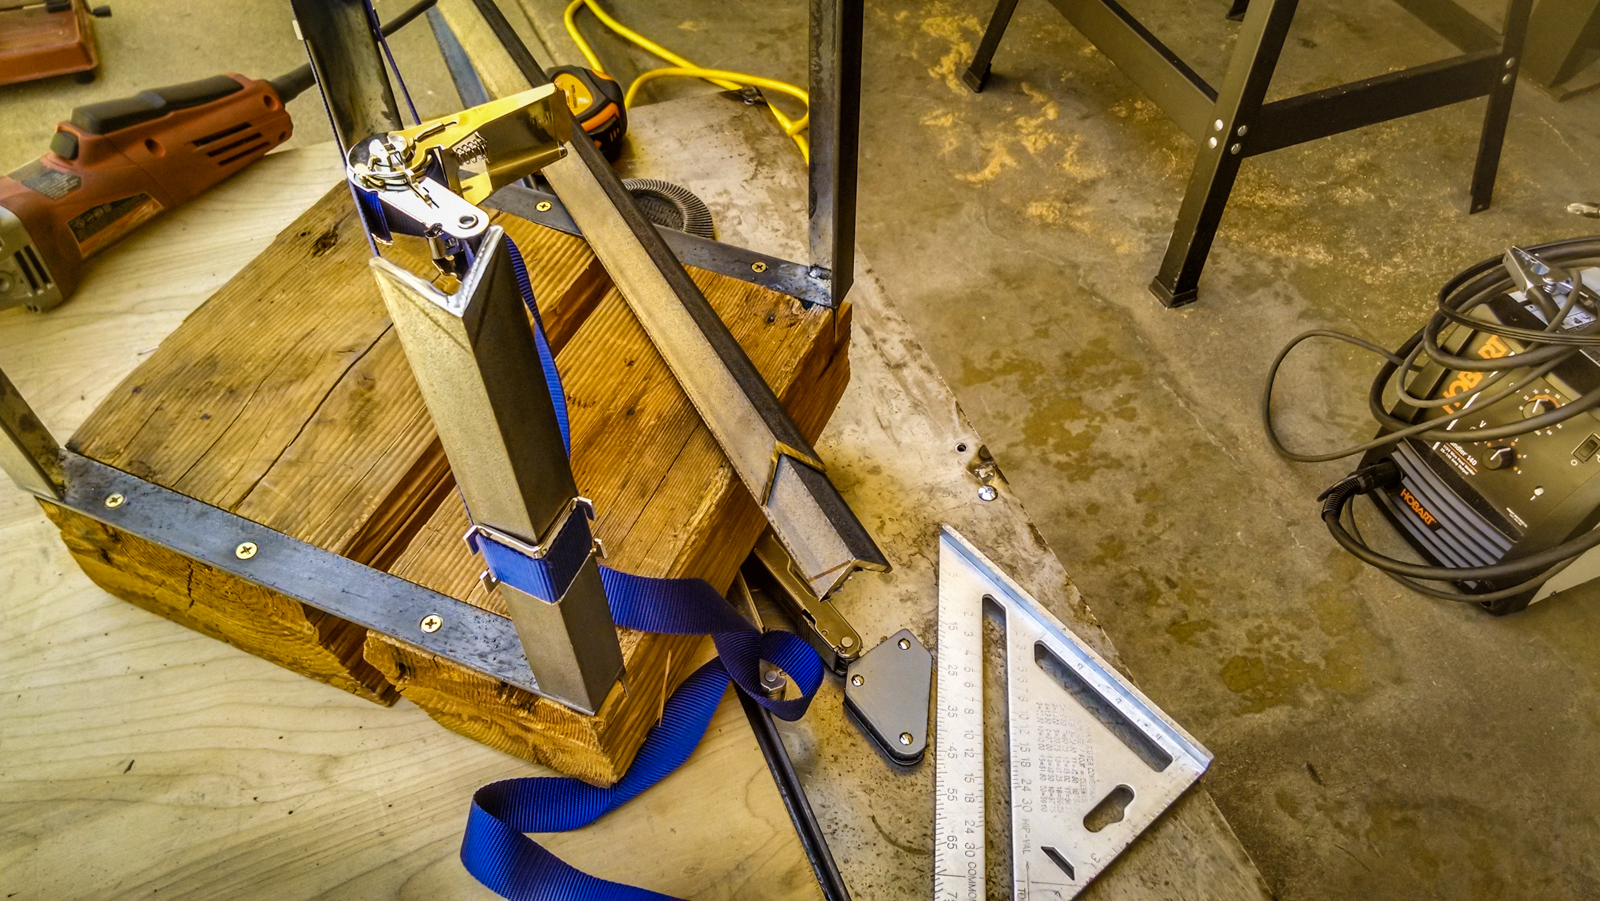
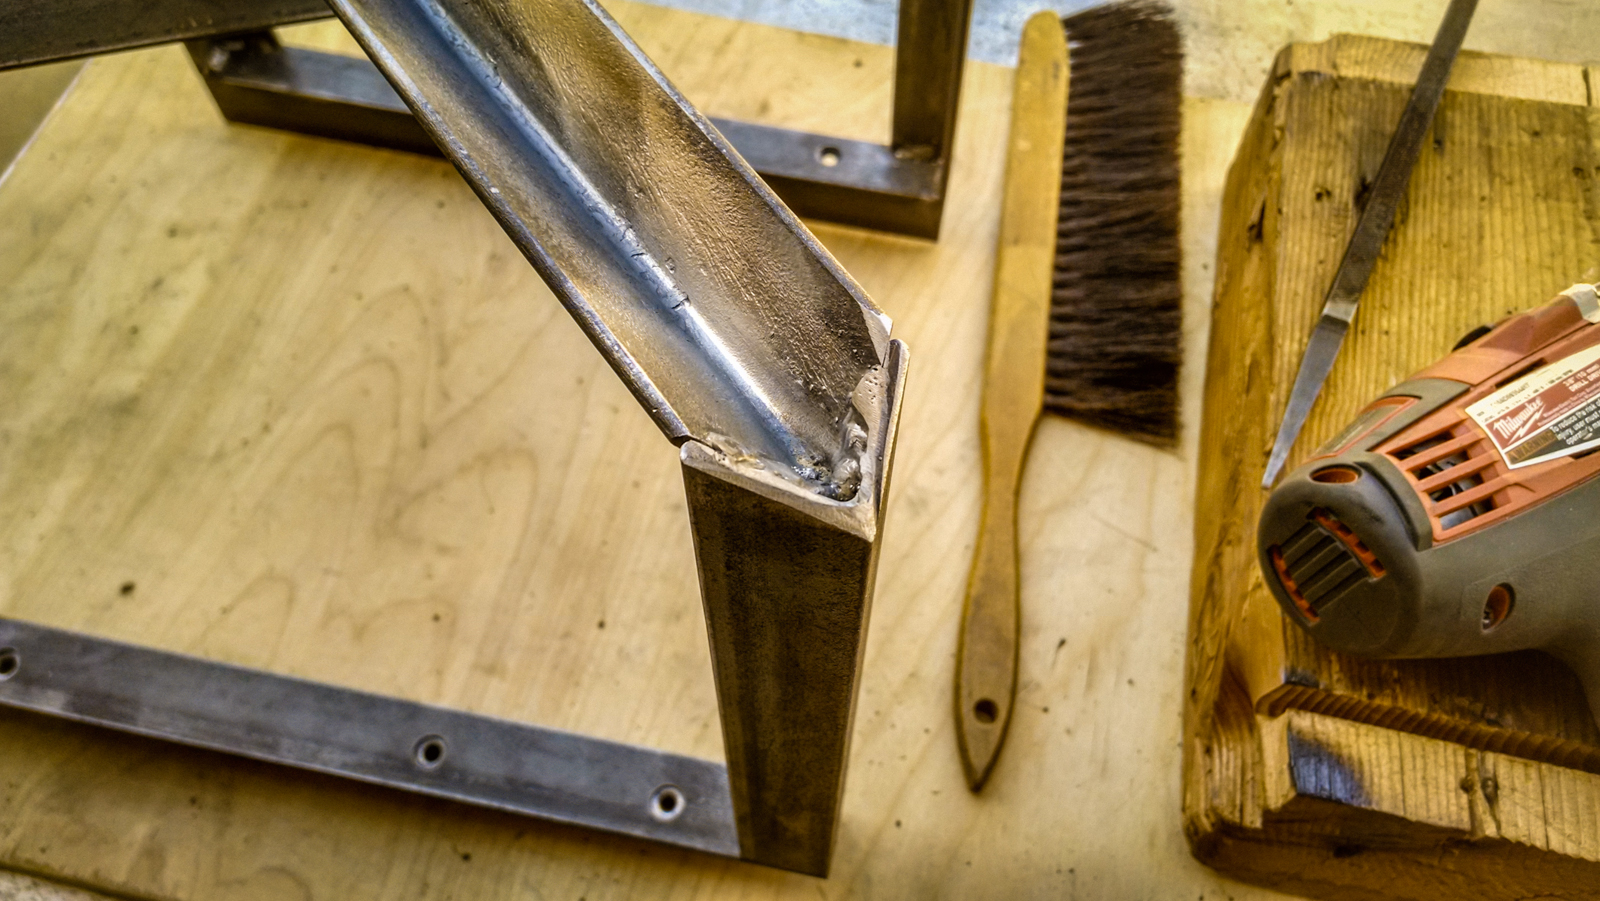
I used 1" Angle 1/8" thk. to create legs and a carriage to both keep the pieces split but supported. The wood was slotted to accept the angle and the angle was drilled and countersunk to accept screws that would be flush from the underside. This part took me from mid day to night. I stopped here because I was not sure what to do with the rest of the legs.
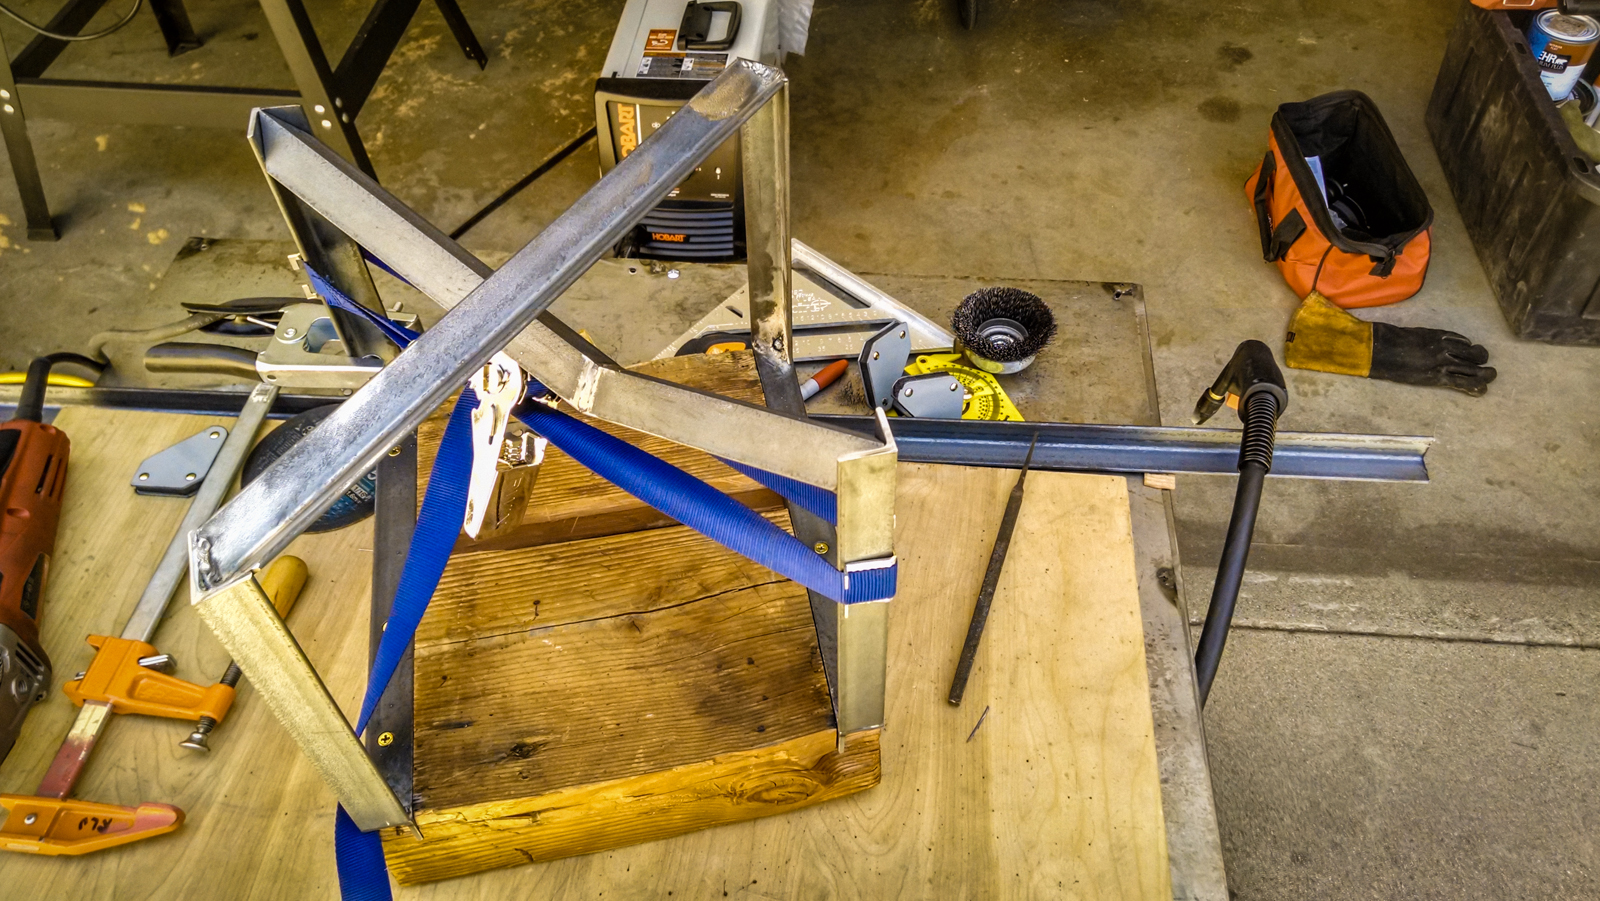
After much consideration and sleeping on it I decided that I would cross the legs over eachother. This accomplishes two things conceptually for me. The first was the idea that I did not want the piece to become something everyone has seen before, a little square stool with a square base that would diminish and not complement the wood it supports. The second was an idea I had for a future piece in that the base is a continuous loop of structure that does not intersect itself. Fabrication of this part took half the the next day. Everything was measure and cut by hand and eye, no modeling or foreplanning. Doing in this way I feel is almost quicker and easier than If I were to model and draw up shop drawings. Mostly due to the fact that is time intensive and the real world isnt perfect and my fabrication skills and tools cant be that as exact, ( I no longer have the luxury of the SCI-Arc shop and only have what I have at home) so this shooting from the hip and working with what I got makes it both immensely fun and satisfying.
The last bit was cleaning everything and prep for its layers of protection. The metal was recieved a few coats of clear matte enamel and the wood received a few coats of polyurethane.
Day 1 Fabrication


Day 2 Fabrication